Hi Everyone,
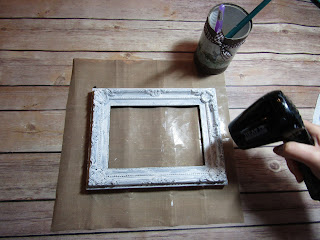
I'd like to share with you how I created this shabby chic painted picture frame!
⚘
You will need;
- One plain picture frame ( size of your choice )
- Paint brushes
- Hot glue gun
- Heat gun
- Transparent primer / Crackle varnish ( I used Antik-Lack )
- Water based paint that has good coverage ( I used Dekor paint chalk effect in the colour olive tree green)
- Antique paste (colour of your choice - I used antique copper)
- Pigmented primer ( I used white gesso )
- Embellishments of your choice ( I used hand made flowers )
Method;
1. Take apart the picture frame In order to paint the parts seperately you will not need the glass insertion. Firstly take the front to paint first and put the other two pieces aside for later.
2. Paint the frame using a white gesso or pigmented primer. Two coats maybe required.

3. Once covered use a heat gun to dry the frame completely.

4. Using the water based paint ( Dekor ) apply an amount onto your brush but before painting the frame paint onto a piece of paper to remove some first then dry brush paint the frame roughly to give the shabby chic effect. USe your heat gun to dry once painted.

5. Using your finger apply the antique paste all around the frame so it brings out the detail.
( A close up of what the antique paste will do to your frame! )
6. Use a paper towel to buff along the whole frame.

7. Take the paint you used to dry brush the frame from step 4 and cover the second piece of the frame that you took apart in step 1.
8. Paint the whole of the back, do not worry if it is not completly covered as it will add to the effect, I did two coats. Dry with your heat gun.

9. Using your transparent primer (Antik-Lack) randomly paint onto the picture frame, do not paint completely just random brush strokes. Dry with your heat gun until it's a tacky texture.

10. Using the paint from step 2 (White gesso) add a little to the side of your work station and add a small amount of water to make it a smoother consitency, this makes it easier to paint with. You will start to see the crackle effect! Dry this completely with your heat gun.
11. Arrange the frame back together, you can now decorate this centre with what you wish.
12. Using a hot glue gun attach them to the middle of the frame in the position that you wish. I used hand made flowers!
You are complete! I hope you enjoyed making it as much as I did!
x


